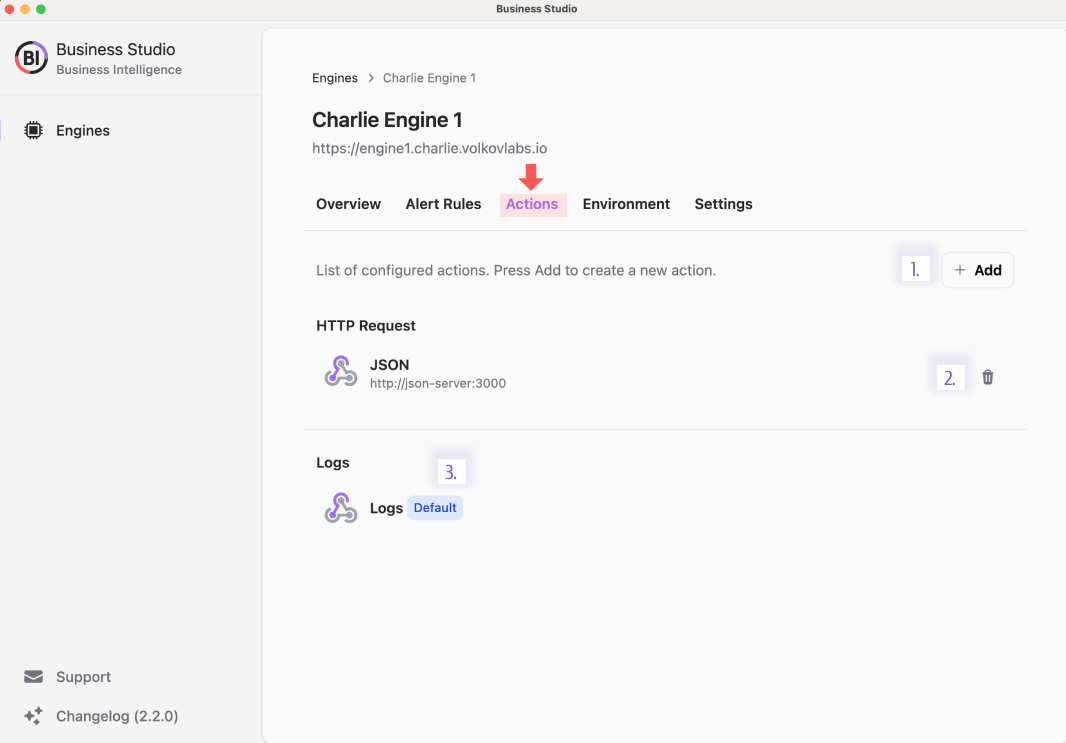
Actions
Use the Actions page to manage actions for the selected Business Engine. Here you can:
- Add a new action.
- Delete an existing action.
- There must be at least one action configured.
Add a new action
The Add a new action window looks as follows:
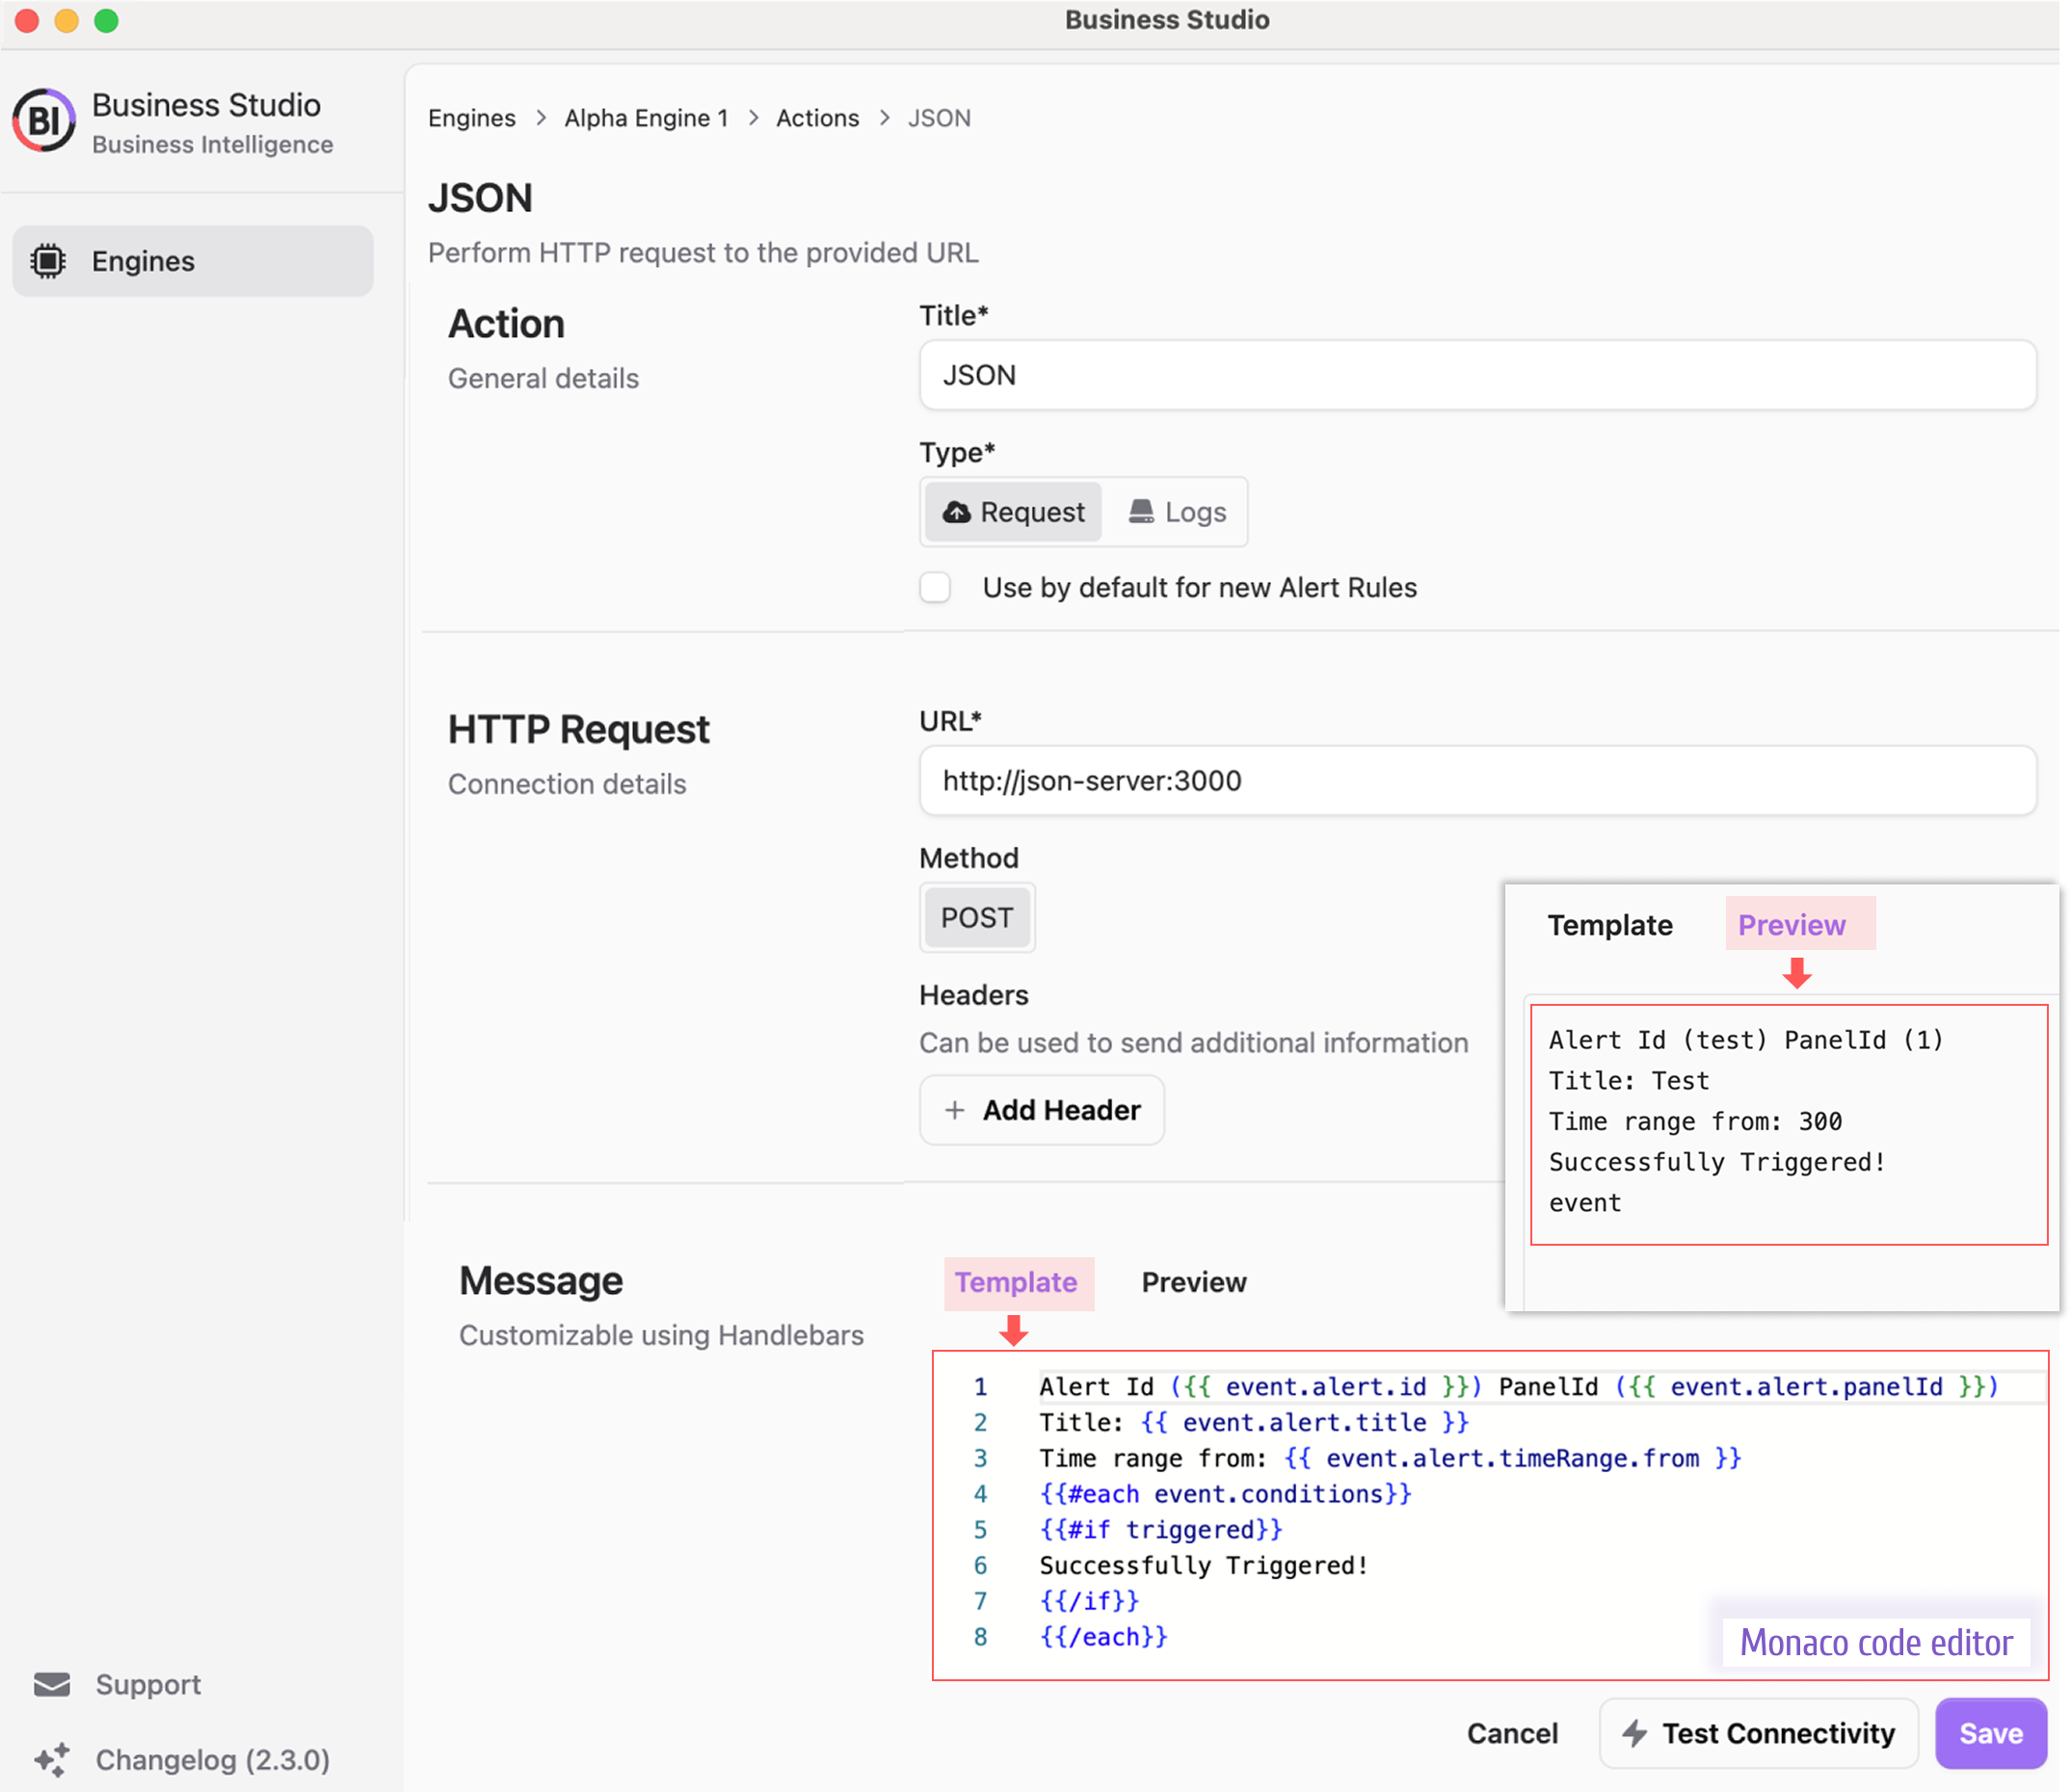
The new action/edit mode has the following configuration elements to specify:
- Title is an action name
- Type options
- HTTP Request will call URL and send JSON payload with event and applied message template.
- If Logs selected, JSON payload will be printed in the Docker container output.
- HTTP Request URL and request method
- Add Headers (additional information) to a request if needed.
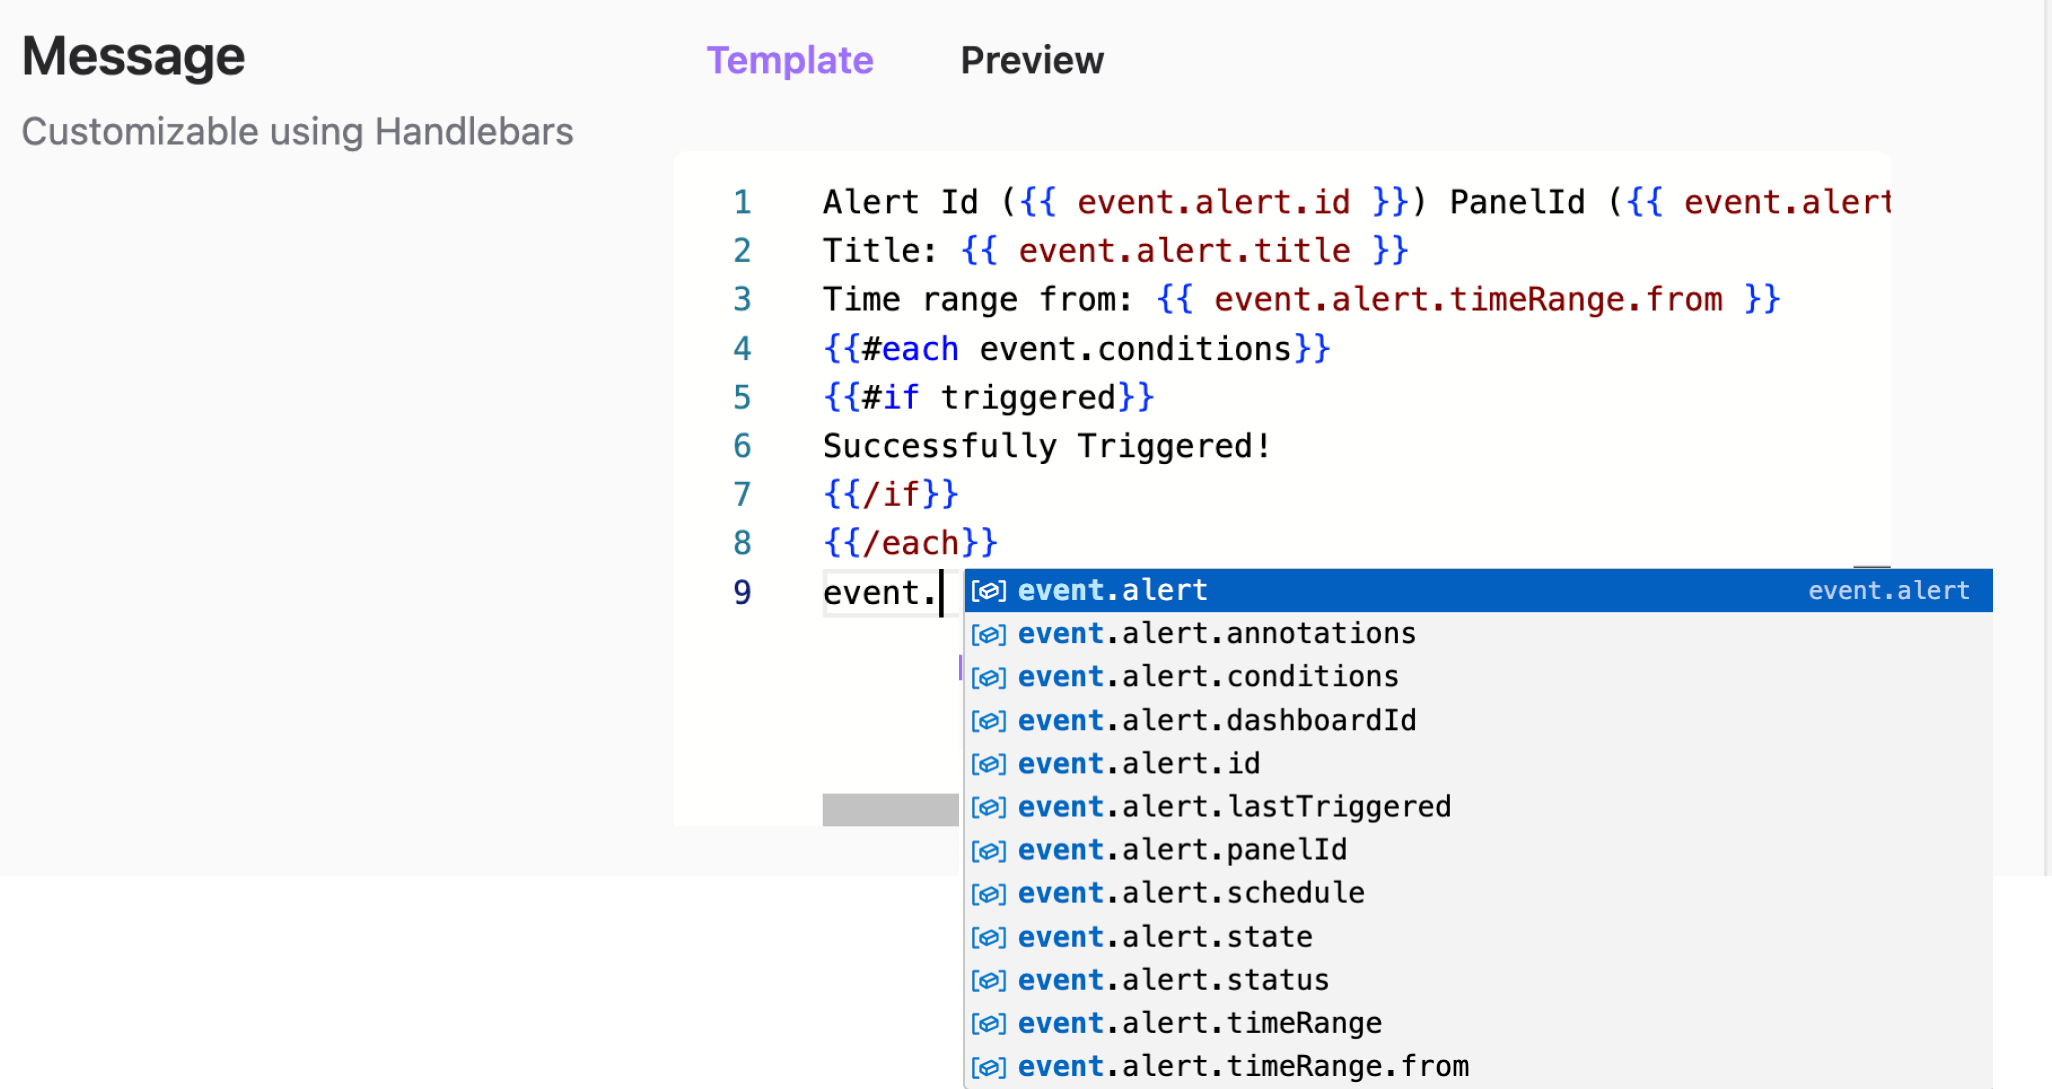
- Message. To work on the messages generated by an alert rule more efficiently, we employed the Monaco code editor. It supports:
- Handlebars syntax,
- prompts (suggestions),
- code formatting.
On the Preview page, you can immediately preview what the message will look like. A context menu with prompts appears after you place a dot after the event object.
Use by default
Any action could be configured as a default one for new Alert Rules by setting the Use by Default parameter to Enabled.
Test Connectivity
You can use the Test Connectivity button to check REST API endpoint availability.
Message template
Based on the event's JSON payload you can create a customized message using Handlebars.
JSON helper
Presents an object (JSON) or an array as a formatted string. Useful to see the structure of the event.
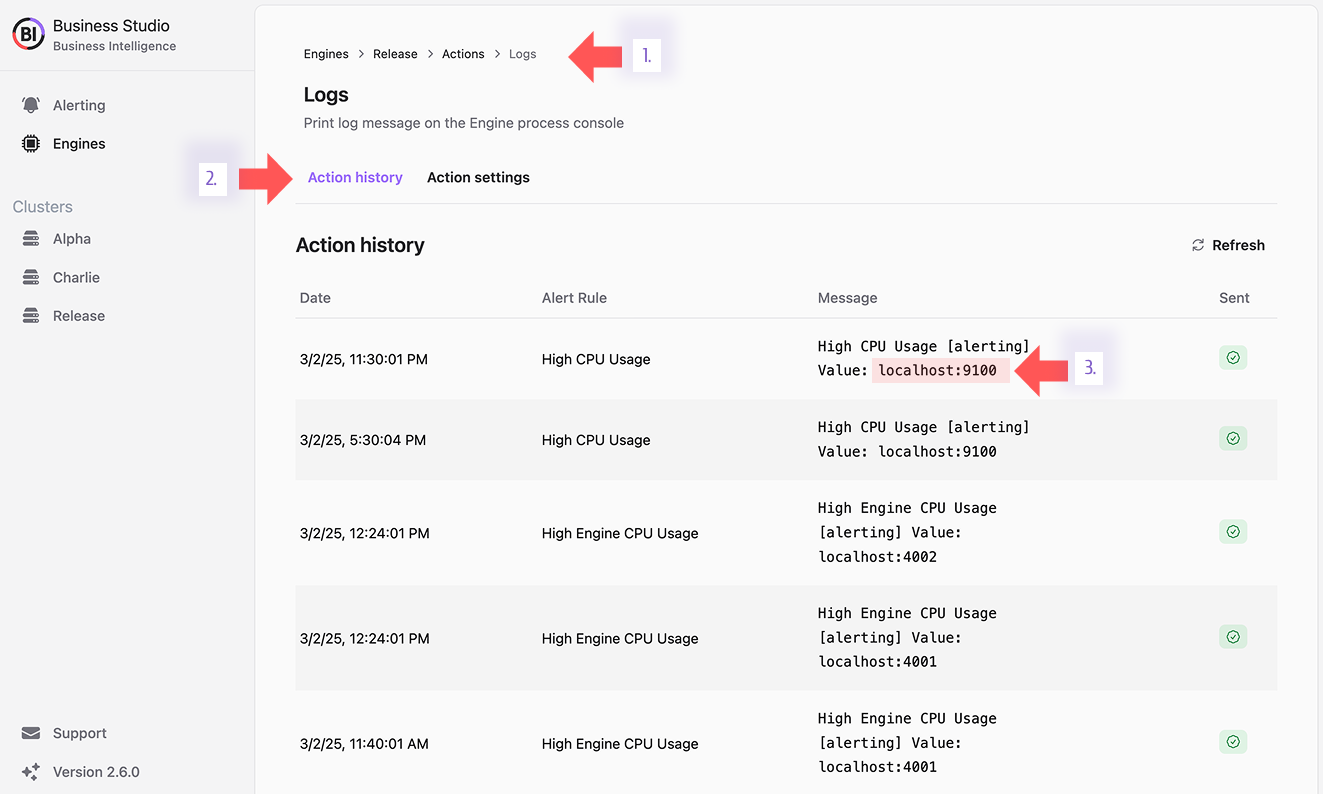
Action History
The Action History page provides a detailed log of messages triggered by alert actions. Here’s how to access it:
- Select a Business Engine, navigate to the Actions tab, and pick an alert action.
- Switch to the Action History page.
- View submitted messages, including resolved variable values where applicable.
This transparency ensures you never miss a notification’s journey.