How to combine Infinity Data Source with the Business Forms


This article provides an example of how the Infinity data source can be integrated with the Business Forms plugin on the Grafana dashboard.
In the next several paragraphs, I will demonstrate how to:
- create a basic business form,
- configure the appropriate Initial request,
- configure the Update Request Payload to pass data into the Infinity data source,
- verify that the Business Forms has submitted the request with the correct values.
Feel free to follow along and get the working template towards the end.
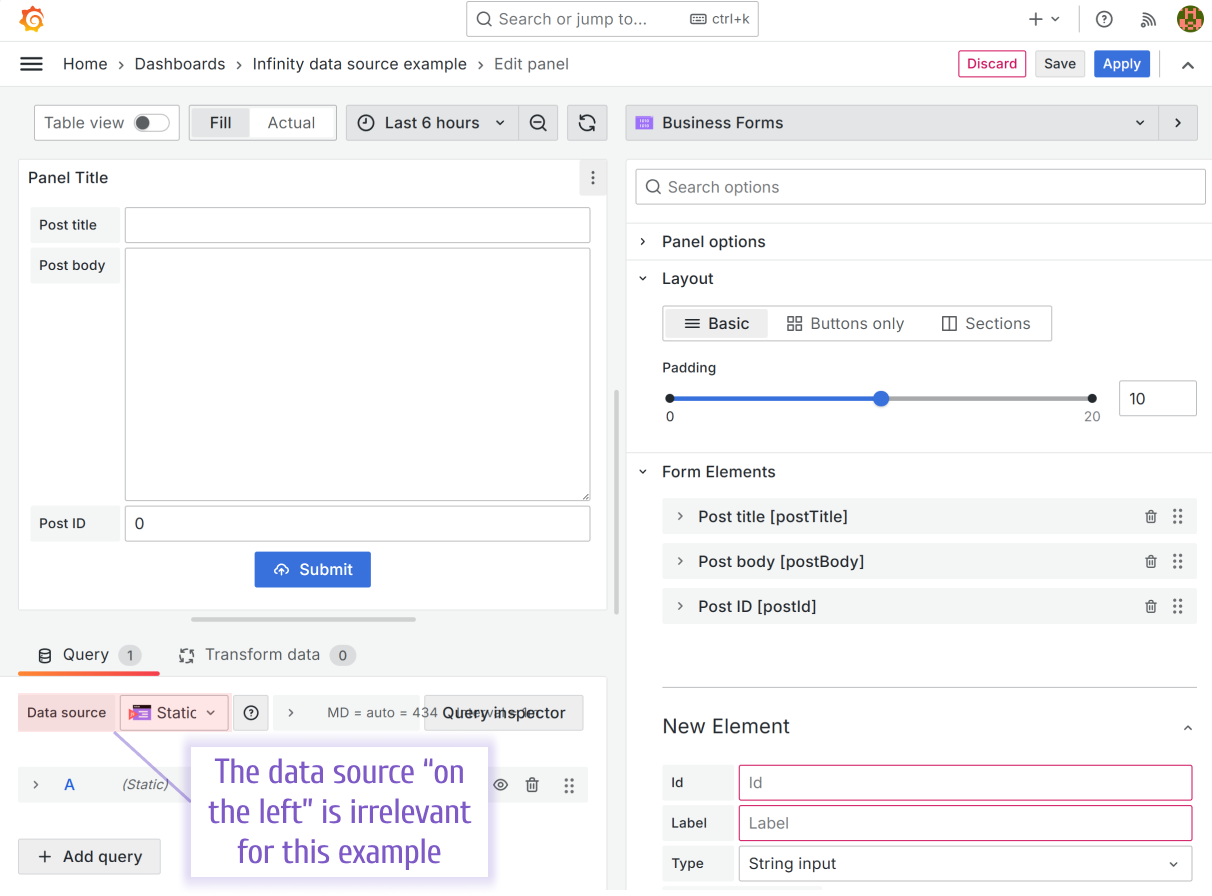
Form Elements
The Form Elements are components the Business Forms plugin provides as building bricks for your data entry forms.
In this article, a data entry form consists of the following elements:
- String input to enter a title that will be passed to the payload:
- name: Post title
- id: postTitle
- Text Area to enter a body that will be passed to the payload:
- name: Post body
- id: postBody
- Number input to enter a user Id that will be passed to the payload:
- name: Post ID
- id: postId
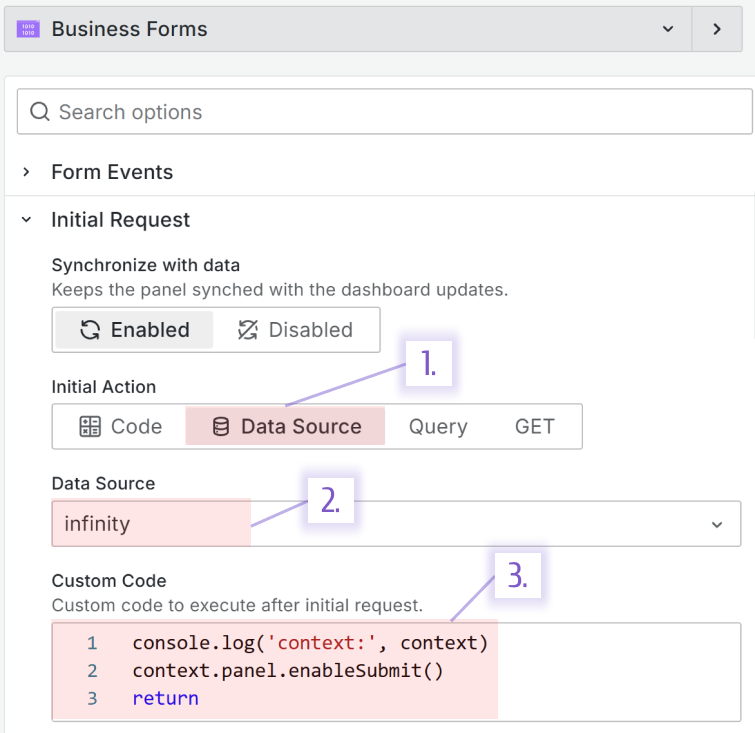
Initial Request
Initial Request and Submit button
The Business Form provides the Submit button by default. I will alter the Custom Code to:
- add the
contextinto browser console output, - have the Submit button enabled right after the Initial Request executes.
This step is not critical rather it simplifies what I am demonstrating.
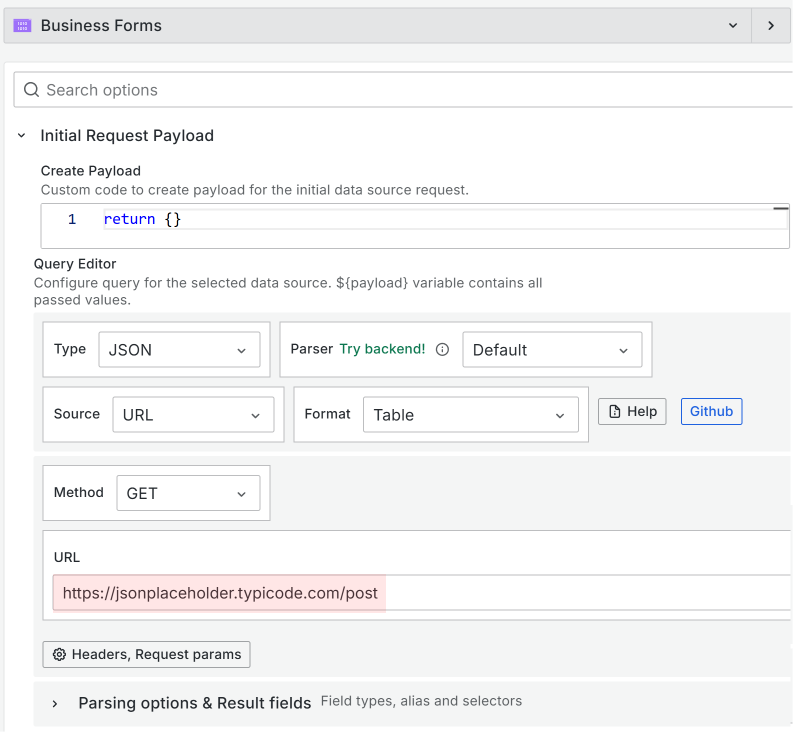
Initial Request Payload
Below is the illustration of the Initial Request Payload configuration. I keep the most parameters by default. URL is set to the endpoint with samples.
The latest version of the Business Forms panel supports Query editors for seamless integration with data sources.
Code to copy.
console.log("context:", context);
context.panel.enableSubmit();
return;
Using console.log('context:', context) you can find available options and methods.
Feel free to set initial data to form elements from the initial request using Form fields.
Update Request
Update Request
The configuration of the Update request looks as follows:
- Set Enable Update set to Manual,
- Set Update Action set to Data Source,
- For Data Source select your Infinity data source.
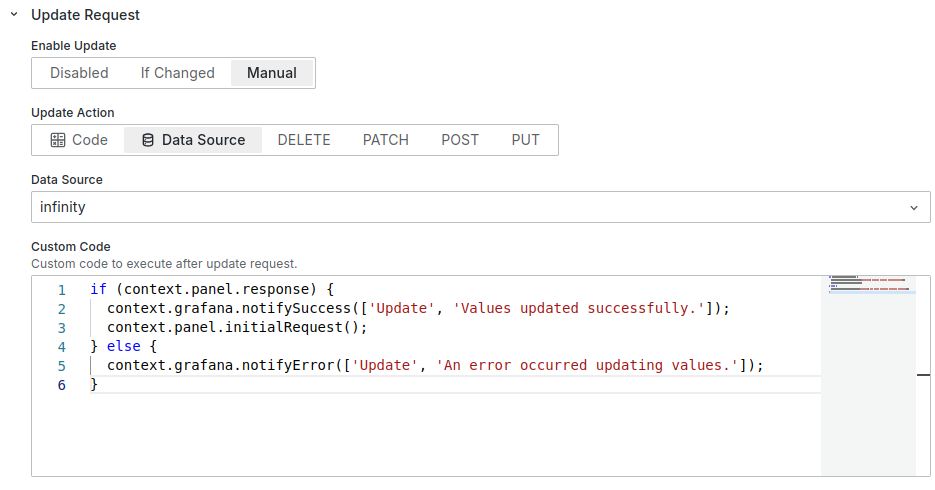
Code to copy. This is the default code. You most likely do not need to copy it since it should already be in place.
if (context.panel.response) {
  context.grafana.notifySuccess(["Update", "Values updated successfully."]);
  context.panel.initialRequest();
} else {
  context.grafana.notifyError(["Update", "An error occurred updating values."]);
}
Update Request Payload
In this step, I use JavaScript and Payload Query editor to pass the Update Request Payload to the Infinity data source.
When Update Request Payload->Request Payload is set to Code, the Create Payload code editor is available.
My payload uses panel element ID to find the corresponding values and send them into the payload. You can send all elements as is or transform them using custom logic.
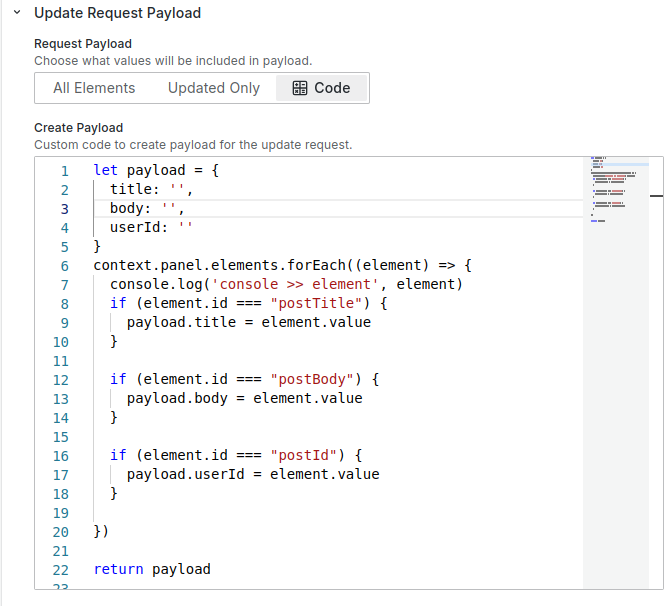
Code to copy.
let payload = {
  title: "",
  body: "",
  userId: 0,
};

context.panel.elements.forEach((element) => {
  console.log("console >> element", element);
  if (element.id === "postTitle") {
    payload.title = element.value;
  }

  if (element.id === "postBody") {
    payload.body = element.value;
  }

  if (element.id === "postId") {
    payload.userId = element.value;
  }
});

return payload;
Query Editor
After the Update Request Payload is configured, I can work on the query to utilize that payload using the Query Editor:
- Set Source set to URL,
- Set Method set to POST,
- Set URL set to the API endpoint. We are using the URL with samples.
Click on Headers, Body, Request params to open options:
- Set Body Type set to Raw,
- Set Body Content Type set to JSON,
- Specify Body Content using the created earlier payload.
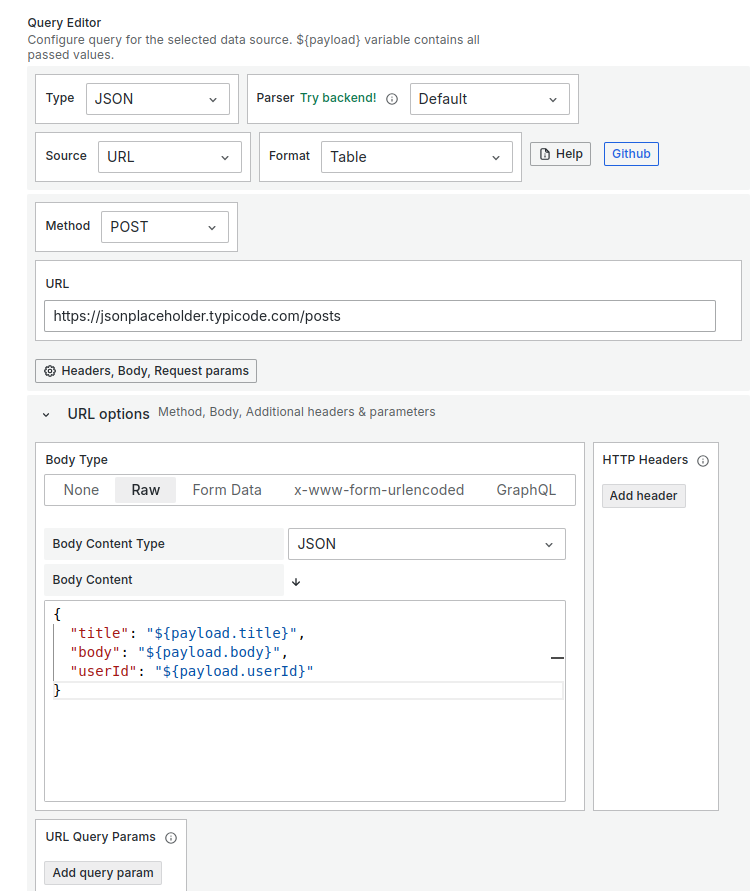
Body Content to copy:
{
  "title": "${payload.title}",
  "body": "${payload.body}",
  "userId": "${payload.userId}"
}
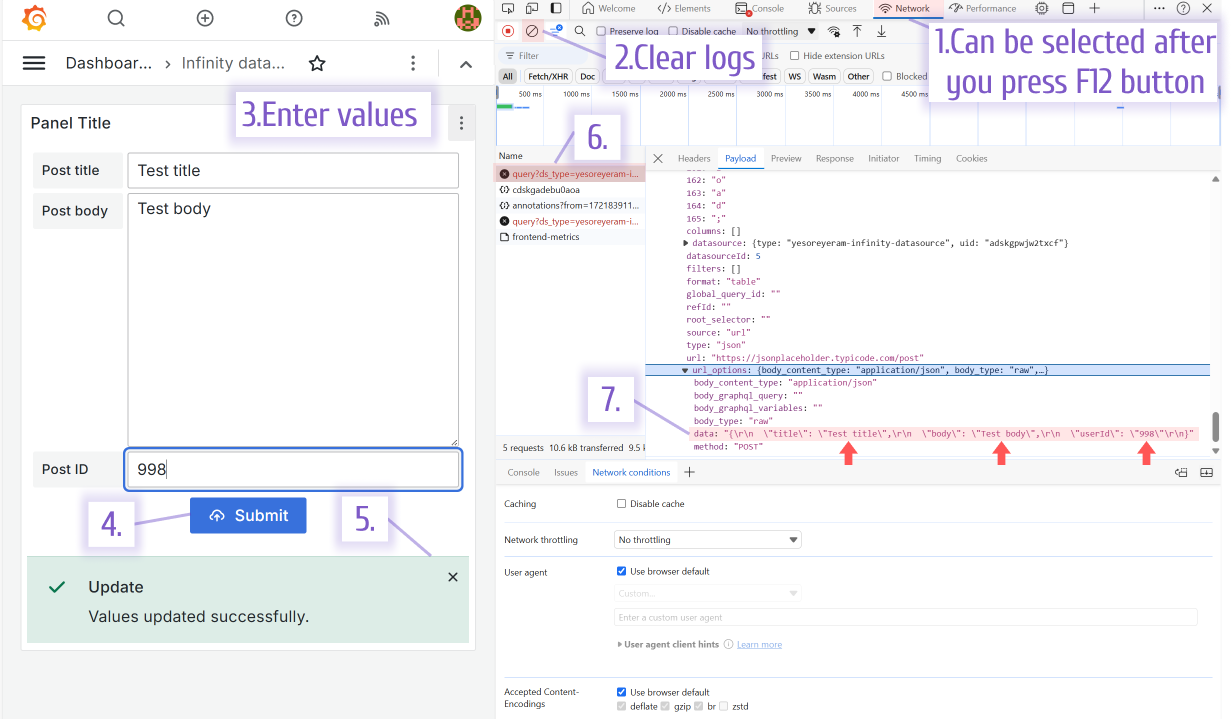
Verify the results
To test that everything works as designed, save the Business Forms panel and open it on the Grafana dashboard.
Next, perform the following steps:
- Press
F12on the keyboard to open the developer panel and select the Network tab. - Clear all logs.
- Enter values on the Business Forms panel.
- Click the Submit button.
- You should see the green success message.
- The query log should appear in the developer panel, select it.
- Expand the query results and navigate to the url_options.
- Confirm the submitted values are identical to your entry.
Hopefully, this article clarifies how the Infinity data source can be combined with the Business forms. If not, we are always open to questions.
Volkov Labs Is Now Closed
Following our acquisition, Volkov Labs has officially ceased operations as of September 26, 2025. We are no longer accepting feedback, support requests, or partnership inquiries. The Business Suite for Grafana repositories have been archived on our GitHub organization, and no further development or support will be provided.
We are deeply grateful for the incredible support from our community and partners over the past four years.