Streaming images using the Business Media panel


This article contains an example of effective collaboration between the Business Forms panel and two data sources (the Websocket and MQTT) to faciliate streaming images on your Grafana dashboard.
Idea for this post belongs to peltiern, the Grafana community member.
Forum Post: https://community.grafana.com/t/display-base64-live-image-from-mqtt-datasource/127028
Websocket
I start with a short video of Minions from a famous cartoon. I split it into several image files and place them all into the folder next to the index.js file.
To bringing these images into the Grafana dashboard, I run a simple server locally, as shown in the code below. This code converts the images into the base64 format, making them ready for submission.
Server
Here is the server code from this example:
const ws = require("ws");
const fs = require("fs");
const path = require("path");

const imagesDir = path.join(__dirname, "images");

/**
 * Find images
 */
const images = fs
  .readdirSync(imagesDir)
  .filter((file) => /\.(jpg|jpeg|png|gif)$/.test(file));

let currentIndex = 0;

/**
 * Server
 */
const server = new ws.WebSocketServer({ port: 8090 });

/**
 * Convert Image to Base64
 */
const convertImageToBase64 = (imagePath) => {
  const imageData = fs.readFileSync(imagePath);
  return Buffer.from(imageData).toString("base64");
};

/**
 * Send Data
 */
const sendData = (socket) => {
  const imagePath = path.join(imagesDir, images[currentIndex]);
  const base64Image = convertImageToBase64(imagePath);

  /**
   * Returned JSON
   */
  const json = [
    {
      name: images[currentIndex],
      image: `data:image/png;base64,${base64Image}`,
    },
  ];

  socket.send(JSON.stringify(json));

  currentIndex = (currentIndex + 1) % images.length;

  setTimeout(() => {
    sendData(socket);
  }, 100);
};

/**
 * Connection
 */
server.on("connection", (socket) => {
  console.log("Connected...");

  setTimeout(() => {
    sendData(socket);
  }, 1000);
});
Data source configuration
Below is the configuration of the WebSocket API data source.

WebSocket address using internal Docker network:
ws://host.docker.internal:8090
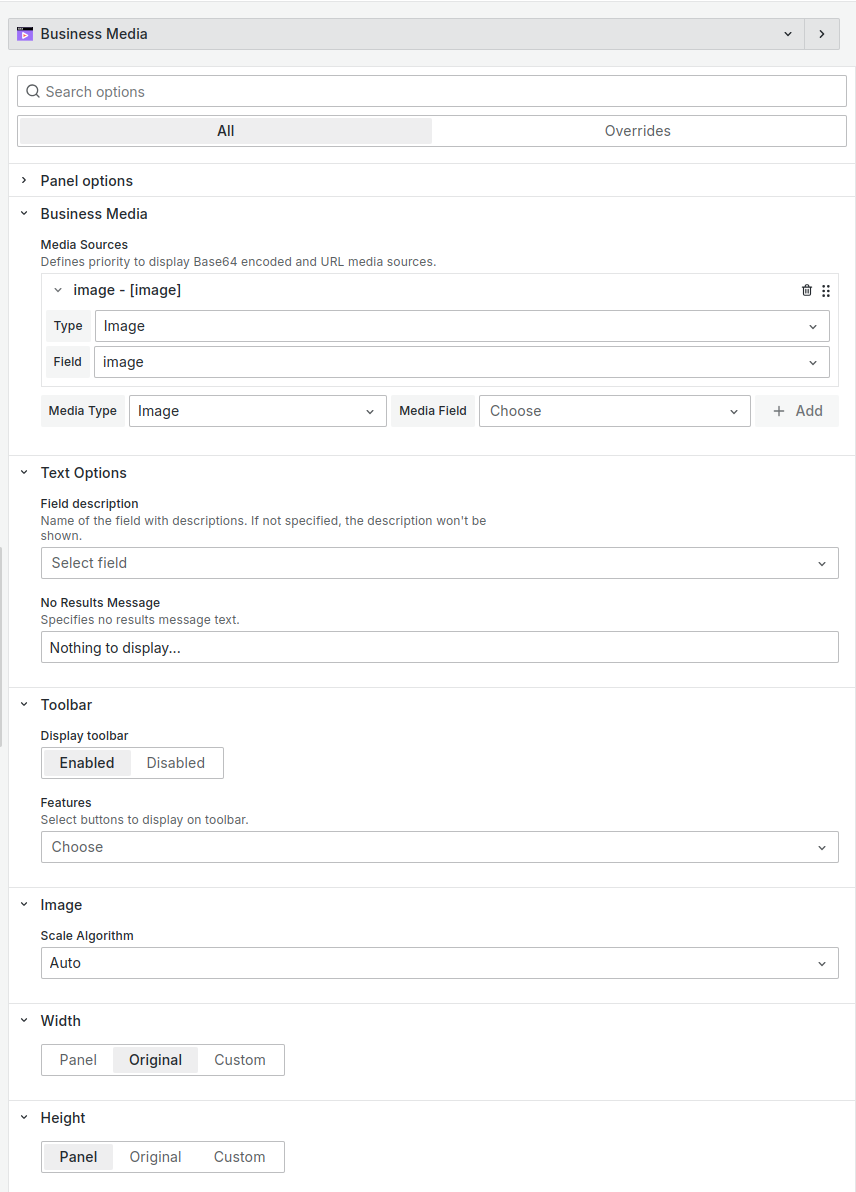
Business Media panel configuration
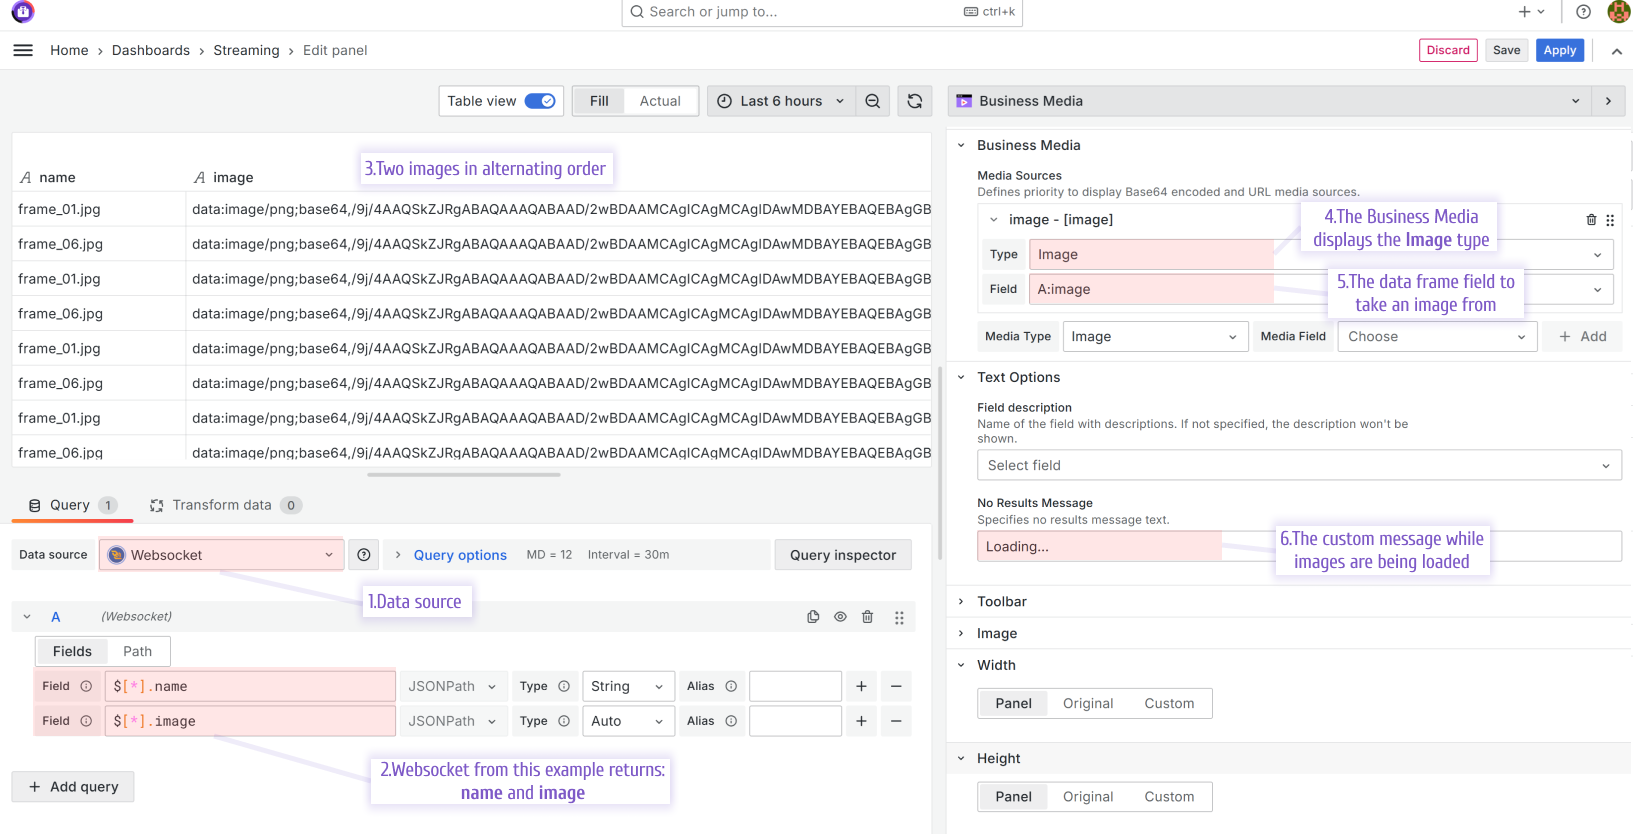
The illustration below is how we configured the Business Media panel to work with the Websocket data source.
The Websocket data source returns the name and image columns in this example.
Result on the dashboard
After the specified steps and saving the panel, you should see the images streaming on your dashboard.
For the loading images time interval, the users will see the message from the No Results Message option (step 6 from the above image).

MQTT
The approach with MQTT is very similar to the WebSocket. The example of the publisher code was provided by peltiern. It streams data to the MQTT data source.
Publisher
The Publisher sample code is below. The full code you can find in the above mentioned Community post.
package org.example.testmqttgrafana;

import org.eclipse.paho.client.mqttv3.MqttClient;
import org.eclipse.paho.client.mqttv3.MqttException;
import org.eclipse.paho.client.mqttv3.MqttMessage;
import org.springframework.beans.factory.annotation.Value;
import org.springframework.stereotype.Service;

@Service
public class MqttPublisherService {

    private String topic;

    private MqttClient client;

    public MqttPublisherService(@Value("${mqtt.broker}") String broker, @Value("${mqtt.topic}") String topic) {
        try {
            this.client = new MqttClient(broker, MqttClient.generateClientId());
            this.client.connect();
            this.topic = topic;
        } catch (MqttException e) {
            e.printStackTrace();
        }
    }

    public void publish(String sousTopic, String content) {
        try {
            if (!client.isConnected()) {
                System.out.println("Client is not connected. Trying to connect...");
                client.connect();
            }

            if (client.isConnected()) {
                MqttMessage message = new MqttMessage(content.getBytes());
                message.setQos(2);
                client.publish(topic + "/" + sousTopic, message);
            } else {
                System.out.println("Failed to connect to MQTT broker.");
            }
        } catch (MqttException e) {
            e.printStackTrace();
        }
    }
}
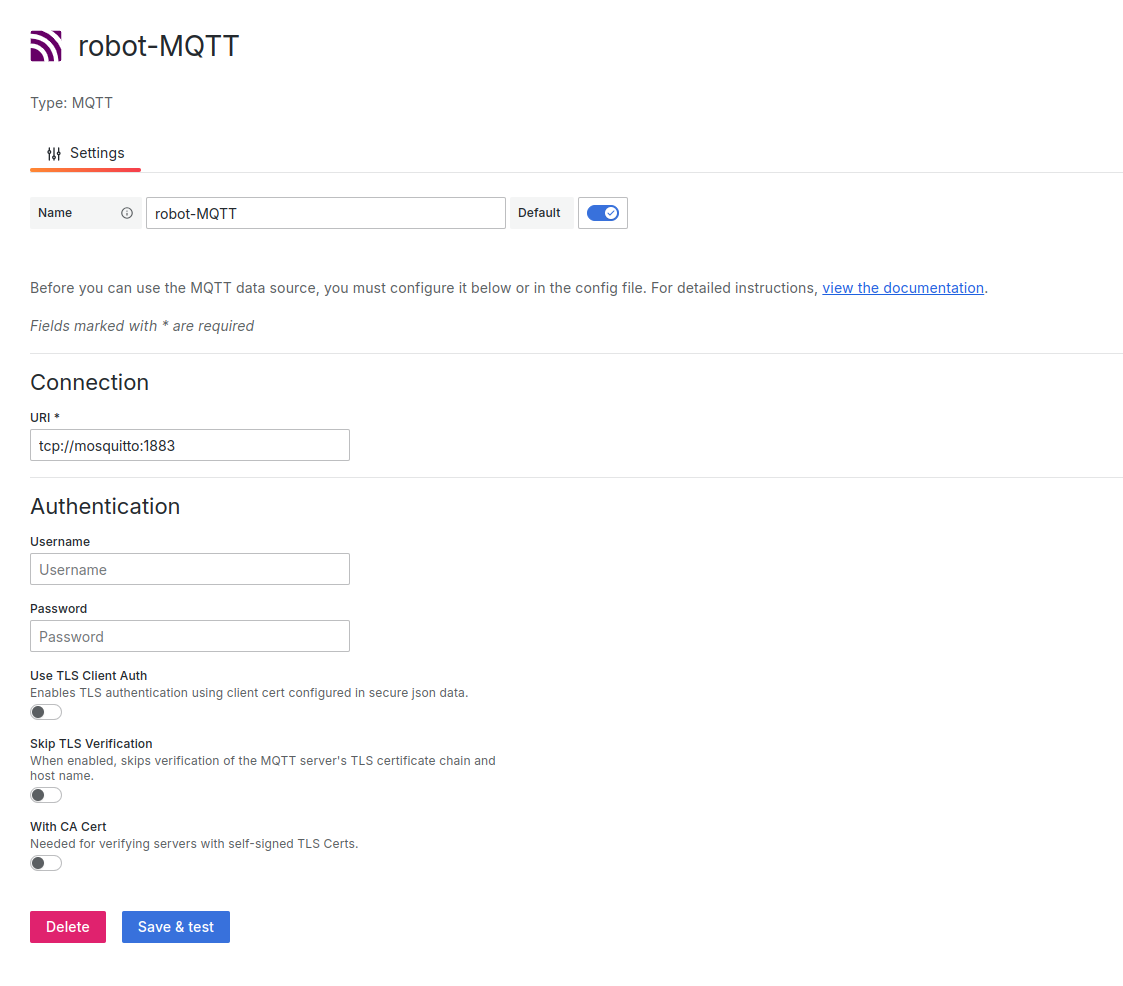
Data source configuration
Here is sample of MQTT data source configuration.
Business Media panel configuration
Below is the Business Media panel configuration to work with the MQTT data source. I specified the topic I am interested in.

Result on the dashboard
Again, thank you peltiern for the provided example of the dashboard displaying image streaming on the Grafana dashboard.
Dashboard has two more visualizations to display streaming data in real-time.
Performance
Remember that the green circle, located next to the Business Media panel title, indicates the panel is operating in streaming mode. If the query settings are not set correctly, rows may accumulate, which leads to insufficient memory and causes the panel to freeze. So, being cautious and attentive to the Query parameters is essential.
Set the Max data points in Query options for the data source. Select the appropriate value to match your result.
In my example, I set the value to 100, and then the rows accumulated using a rolling buffer. You can check this by turning on the Table View.

Volkov Labs Is Now Closed
Following our acquisition, Volkov Labs has officially ceased operations as of September 26, 2025. We are no longer accepting feedback, support requests, or partnership inquiries. The Business Suite for Grafana repositories have been archived on our GitHub organization, and no further development or support will be provided.
We are deeply grateful for the incredible support from our community and partners over the past four years.